Once a Mosaic page has been created you are ready to add Tiles to the Mosaic page.
If you have not clicked on Customize and you do not see the Format & Insert tab like in the image select Customize.
 Now you should see the Tabs Format & Inset on far right

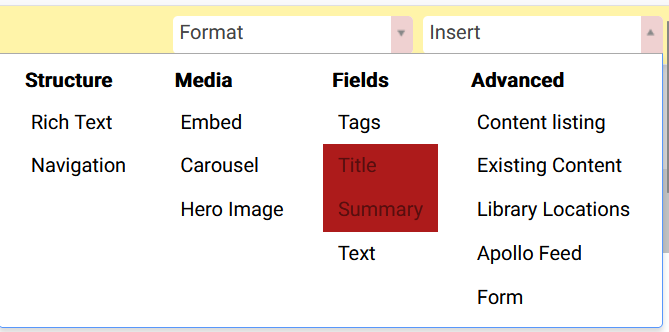
To see all the different tiles that can be added using the Insert function select the drop-down to view all your options.
Hint: You can add row indicators to your page to help with adding tiles. The row indicator only show in edit mode and is not displayed in the browser after saving and then viewing the page. This in placing your tiles and making sure it is going to a new line or will add column if a tile is placed in an a row already containing a tile.
To activate this function press ALT on your keyboard.
The indicator can be any color which is determined by the template you use. In this case the indicators are red.
When adding any tile from the Insert tab in Windows you only need to click the mouse button once. (Do not try to drag the word down by holding the left mouse button down.)
Once you have done a single left click on a tile such as Rich Text then use the mouse to place the tile on the page where want the tile. A green line appears when a valid place is detected to drop a tile by clicking the left button once more.
A video example of adding a Rich Text tile to a Mosaic page and also creating a column within a row.
Note: In order to see where a tile
Was this article helpful?
That’s Great!
Thank you for your feedback
Sorry! We couldn't be helpful
Thank you for your feedback
Feedback sent
We appreciate your effort and will try to fix the article